|
WestonE
|
 |
« Reply #180 on: December 11, 2014, 12:33:42 PM » |
|
Stuart
Do NOT go for socks on trumpets it will reduce your power and if you draw in hot air potentially cause detonation on your existing calibration. There is also increased fire risk and sometimes they get sucked in causing lots of damage. Increase inlet pipe size to the air box e.g. 76mm and ensure there is a stand off from the trumpet mouth to the facing wall of the air box of at least the choke diameter of the throttle bodies. Try to bring the walls surrounding the trumpets to at least half the TB internal diameter. You might want to taper down the airbox from the inlet and this is often done to help even flow with side entry air feeds.
You know why I know this stuff. I just want to prevent you wasting time and money.
EW
|
|
|
|
|
 Logged
|
|
|
|
|
HFStuart
|
 |
« Reply #181 on: December 11, 2014, 02:03:57 PM » |
|
Eric,
The work is cheap enough to do but the main incentive is not destroying the engine so I appreciate the suggestions.
I'll be running wide band lambda before I do anything on the intake so I'll be able to see what effect the changes have on mixture via the Emerld logging system. I'll probaly run closed loop eventually.
The intake is 76mm with a decent cone filter on the end in a cold air area. The trumpets are 48mm and the airbox 90mm deep (I think- I'll check). The airbox walls are over 25mm from the trumpets. All this suggets the design should work.
On the rolloing road taking the lid off the airbox liberated 6bhp and made the mixture go lean (it could have taken about 7% more fuel) so it's obviously a restriction - the question is where ?
|
|
|
|
|
 Logged
|
|
|
|
lanciamad
http://www.flickr.com/photos/lanciamad
Hero Member
    
 Offline Offline
 England
Posts: 699
Marcus Robinson
|
 |
« Reply #182 on: December 23, 2014, 09:13:18 PM » |
|
It looks like with my setup as it is, my only option is going to be using an air box with an inlet behind the n/s main beam, as the trumpets are only a few inches away from the rad as well as being smack bang in the middle. Managed to get pretty much everything mocked up now, as far as I know all the wiring is now connected, once I have it running I can make a start on tidying all the wiring, soldering a lot of wiring to remove a lot of the crimp connectors and a general clean up once i've decided on some bracketry and how to go about mounting an air box... 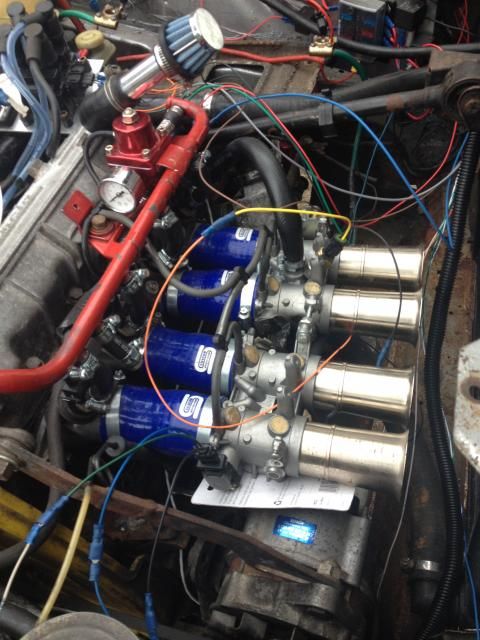 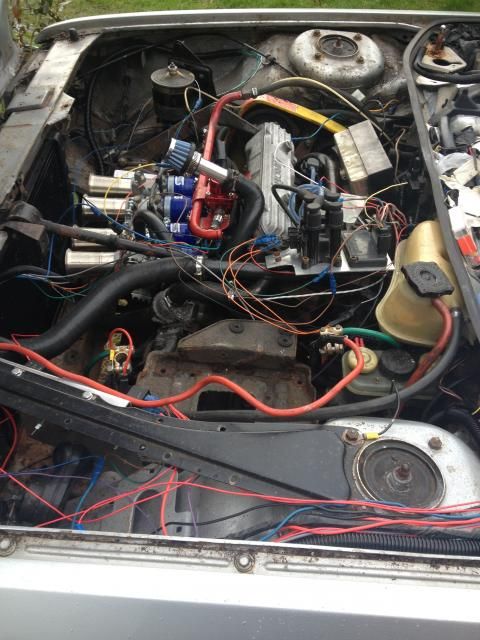 New fusebox for the Megasquirt / Edis setup now features 5 relays, to take control of the ECU, fuel, ignition, starter motor and cooling fans. With it all being switched through the relays, the original ignition switch should have a lot less current running through it... 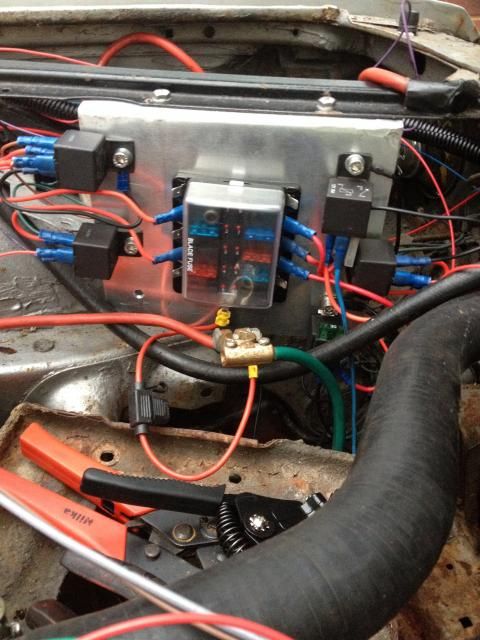 Lambda/O2 sensor now fitted, i'm using the Innovate LC-2 Wideband Controller which has an air/fuel ratio gauge which I hope will fit quite neatly in the gap for the radio along with two other gauges... 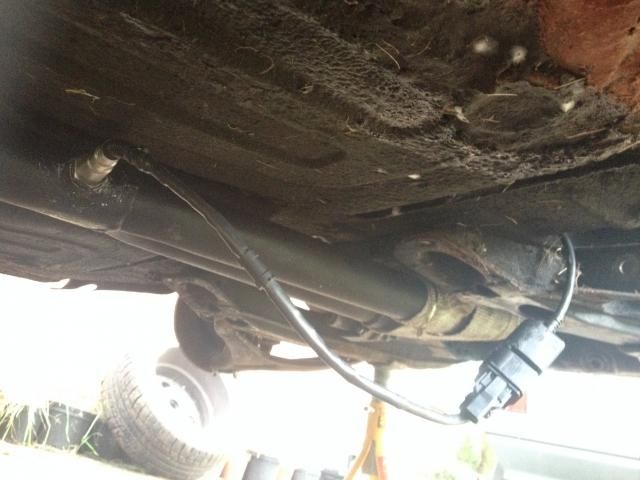 I've managed to plug in the laptop and have a little play with the functions for megatune and tunerstudio. So far I have managed to get a few readings working for various sensors, such as lambda, tps, coolant, air temp etc which is an encouraging start. However what i've found out is that because I will be running the Ford EDIS ignition system, the current ECU will either need to be upgraded to support this or I will end up selling mine to fund an improved replacement. With christmas soon upon us and lots of businesses closing down up until new year, it looks like it maybe some time until I can get the ECU modified and have a go at getting it running.  Darren is/has run a very similar setup to what i'm trying to achieve and has kindly sent me his map, so i'm hoping that apart from the ECU issue it won't take too much fiddling to have it running, famous last words. |
|
|
|
|
 Logged
|
|
|
|
lanciamad
http://www.flickr.com/photos/lanciamad
Hero Member
    
 Offline Offline
 England
Posts: 699
Marcus Robinson
|
 |
« Reply #183 on: January 01, 2015, 11:00:09 PM » |
|
ECU was sent off to be upgraded and now back with me  Hoping to have everything mocked up, plugged in and make a start on setting up a map to run it soon / find out why it won't  While the ECU was away, I thought I better investigate the condition of the inner wing as signs were starting to show in the engine bay, which i'm sure would have been picked up on the MOT. Look to have caught most of it in time, from strut top back is mainly surface rust, from strut top down towards the lights turned out to be more sealant and paint holding the arch together than metal... 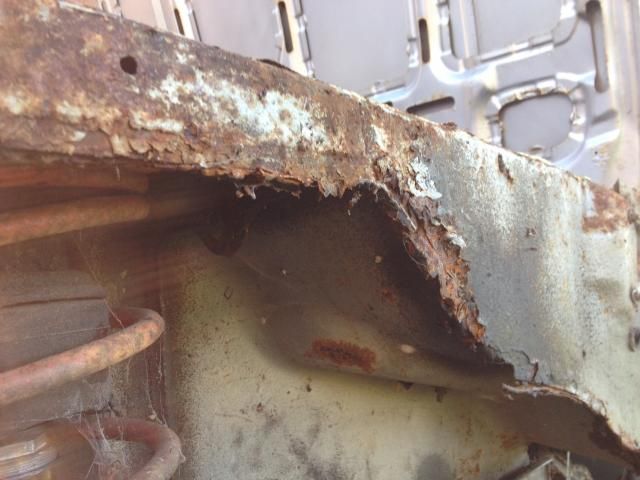 Still a few more things to do on it, but mainly there... 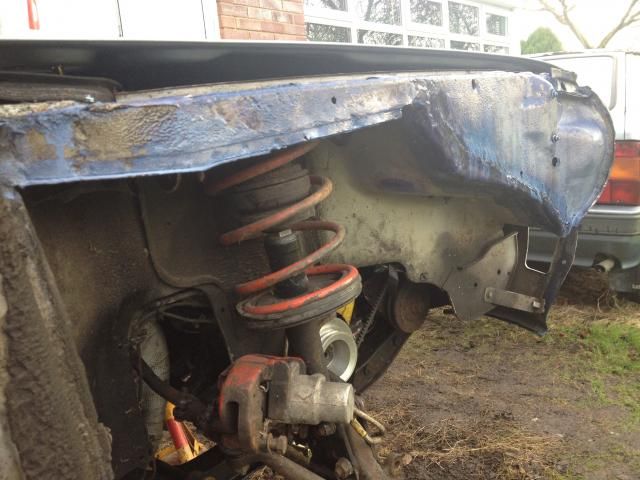 The gauges arrived for water temp and oil pressure, so decided to fit these along with the air/fuel ratio gauge. Luckily the original radio blank is just wide enough... 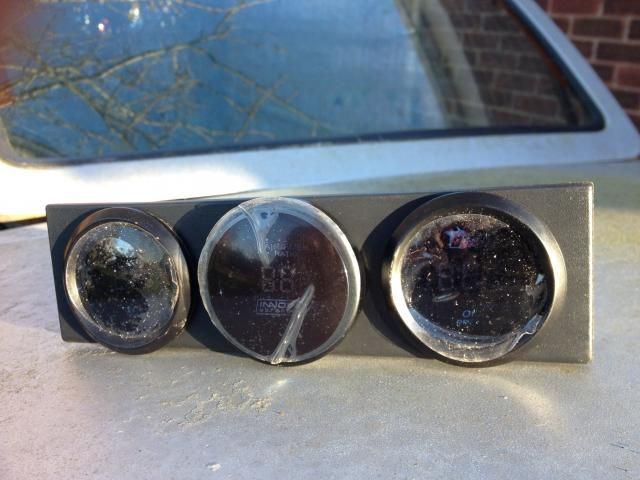 I've got to connect up the signal wires yet but all seems well... 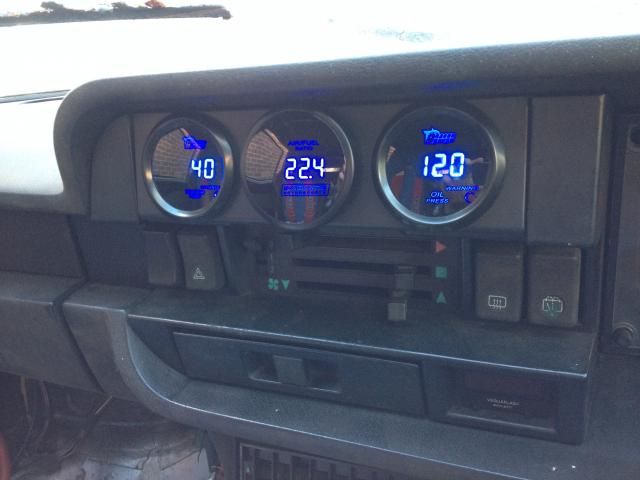 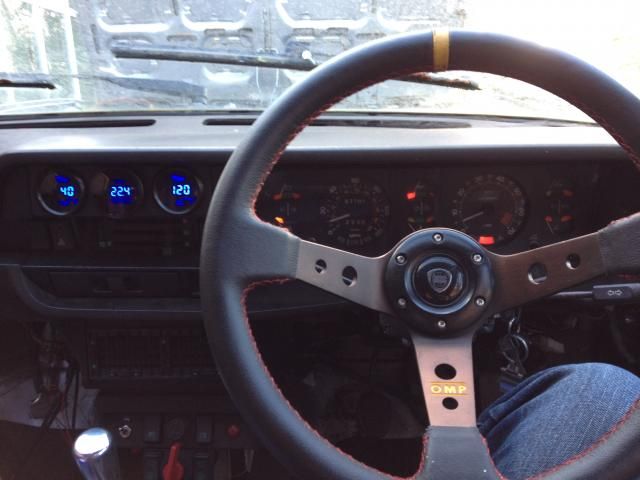 |
|
|
|
|
 Logged
|
|
|
|
|
LanciaNut69
|
 |
« Reply #184 on: January 03, 2015, 09:34:22 PM » |
|
It's all coming together nicely! Look forward to hearing that it's running, and then the fun really starts!!
Cheers
Darren
|
|
|
|
|
 Logged
|
|
|
|
lanciamad
http://www.flickr.com/photos/lanciamad
Hero Member
    
 Offline Offline
 England
Posts: 699
Marcus Robinson
|
 |
« Reply #185 on: January 07, 2015, 01:08:08 AM » |
|
Slowly but surely it's getting there  So many small, time consuming jobs to do all the time but hoping that the fun isn't too far away now. Repairs to the inner front wing now complete, just a bit of painting to do in the engine bay and it should look reasonably tidy... 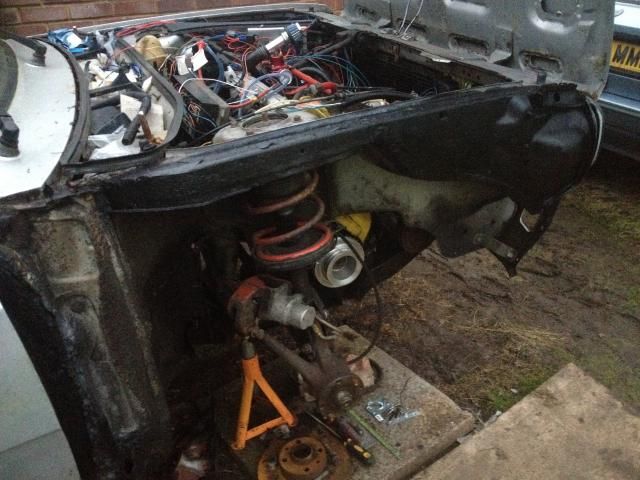 Last week I had a go at connecting everything up and see where I was with the Throttle Bodies install, according to megasquirt all was well apart from the coils not firing. It seems that the hall effect sensor I had as the crank sensor isn't compatible with running the EDIS ignition, so it was back to the drawing board. I've bought a VR sensor which is pretty generic to replace it; the one I bought just happens to cover a lot of the Fiat range. I'm still contemplating on how i'm going to resolve the crank position sensor placement / re-routing of alternator belt, but managed to mock up some brackets well enough to allow me to fit and test the new sensor. Holding out hope I connected up the new sensor, turned it over and still no spark.  Thankfully it was just a case of switching the wiring around and the coil came to life and sparked on cranking. I'm pleased to say, she's alive!  https://www.youtube.com/watch?v=I1B1ofbegmk&feature=youtu.be https://www.youtube.com/watch?v=I1B1ofbegmk&feature=youtu.beI'm sure there is plenty of work to be done and problems to overcome before it's fit for the road, but it's nice to know that all the wiring seems good and it does run, if quite roughly at the moment. The very brief time I had it running, there seems to be a lot deformation to the hoses under vacuum for in particular 2 & 4 for some reason  I managed to have a quick look at the laptop, and the only concern seems to be that according to megasquirt it was running at an ignition advance of 28 degree's. Will have to do my research into setting up the EDIS setup as this seems way off... 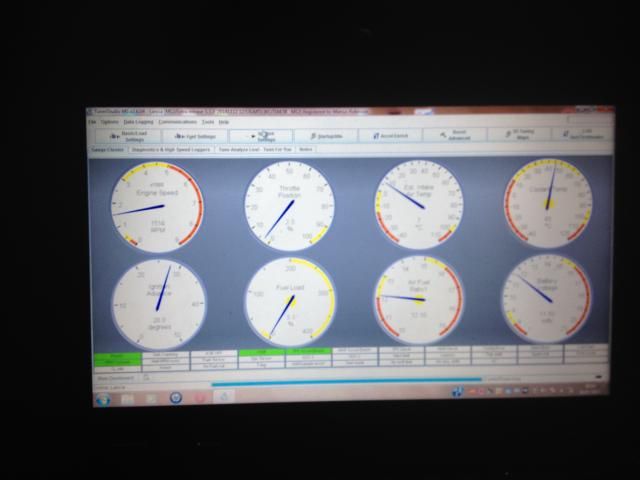 |
|
|
|
|
 Logged
|
|
|
|
|
LanciaNut69
|
 |
« Reply #186 on: January 07, 2015, 09:35:30 AM » |
|
Well done matey, a very large hurdle cleared!!! 👍👍
Check the relative positions of TDC, the crank sensor and the missing tooth on the triggerwheel to be absolutely certainly that they're all EXACTLY correct to one another. Check the spark map too to confirm that the advance should be a lot less at Tickover before you do anything else.
Seeing the pulses in the ITB connecting tubes is normal as you're not using solid. Mine pulse too and it's not a problem.
Keep the updates coming!
Cheers
Darren
|
|
|
|
|
 Logged
|
|
|
|
lanciamad
http://www.flickr.com/photos/lanciamad
Hero Member
    
 Offline Offline
 England
Posts: 699
Marcus Robinson
|
 |
« Reply #187 on: July 27, 2015, 10:05:36 PM » |
|
Well not quite the progress I wanted, but nothing normally goes to plan nor anywhere near the predicted time schedule. A few things that i've done over the months to keep things updated. Hopefully i'll get more time soon to push through some of the smaller but most time consuming jobs, and get it closer to being road worthy once again   Additional oil pressure sender with union and pipework... 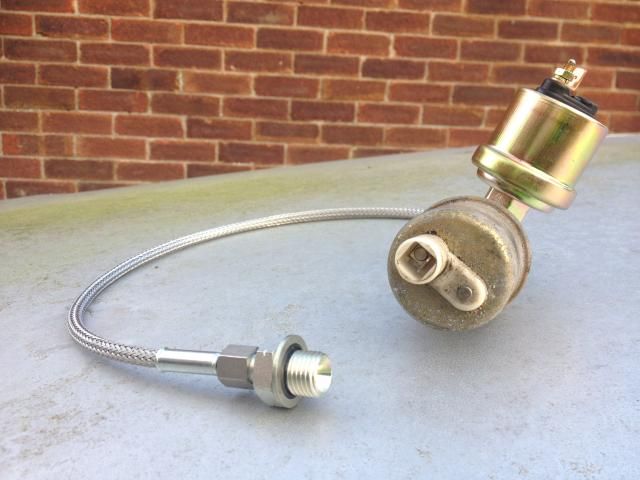 Trying to see a simple way of clearing the crank position sensor, with it mounted in the original designated place for the trigger wheel, I mocked up some bracketry and idler... 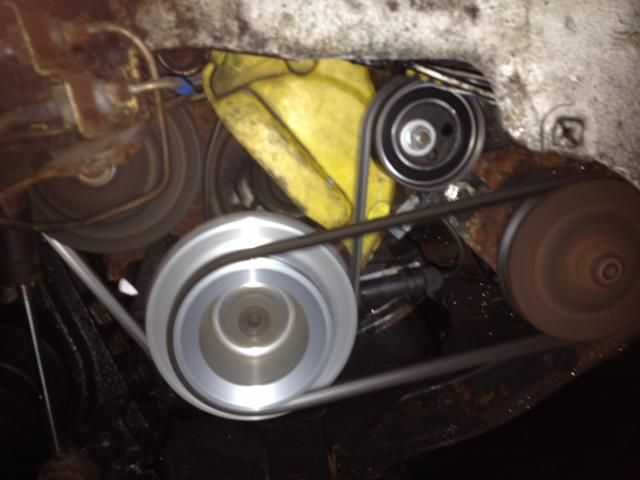 I wasn't too happy with the added strain on the belt and the offset that was caused by having to have the alternator slightly out of line, and after a re-think, managed to fit the sensor between the alternator belt and power steering belt, and redrilling and attaching the trigger wheel to match up with the sensor at tdc... 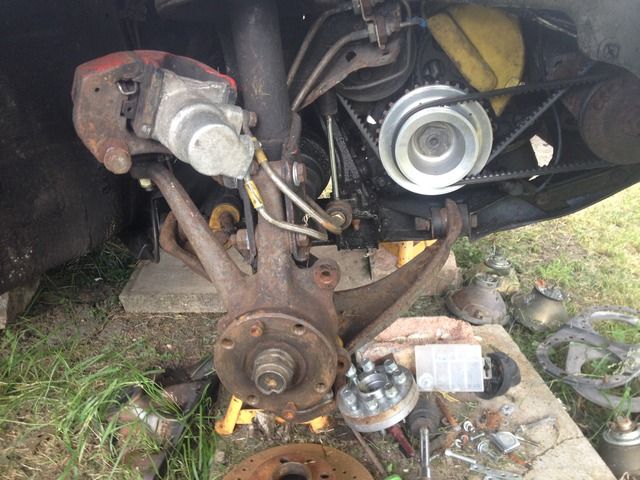 Brakes, wishbone, ball joint and anti-roll bar reconnected... 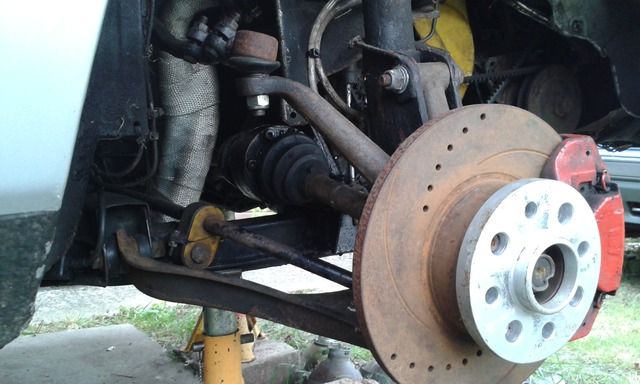 The lambda/o2 sensor wiring held in place by clips... 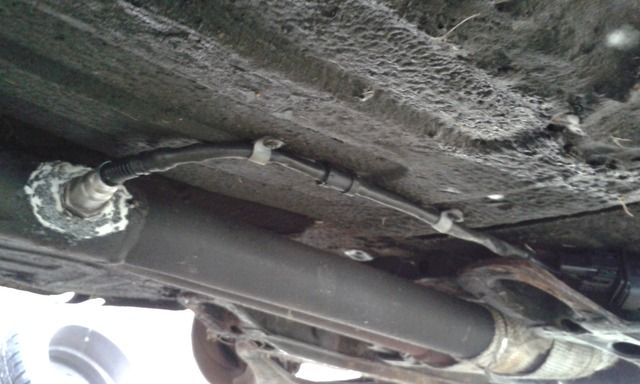 Wheels go back on after too many months  , I think they suit the car quite well and couldn't resist a pic before it went back onto the ground... 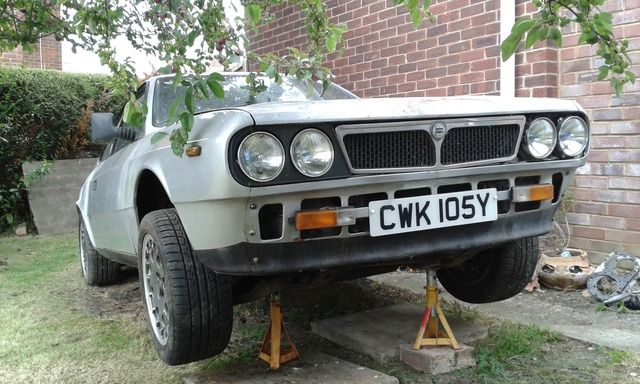 Having got it back onto it's wheels again, I managed to set it with a rough fast idle to move the car about enough that I could get the rear end lifted for a change. I bought the straight through middle section for the HPE from Mark many months ago, and decided it had to go on even though the list of things to do is still never ending. New next to old, it feels like it weighs half the weight of the original... 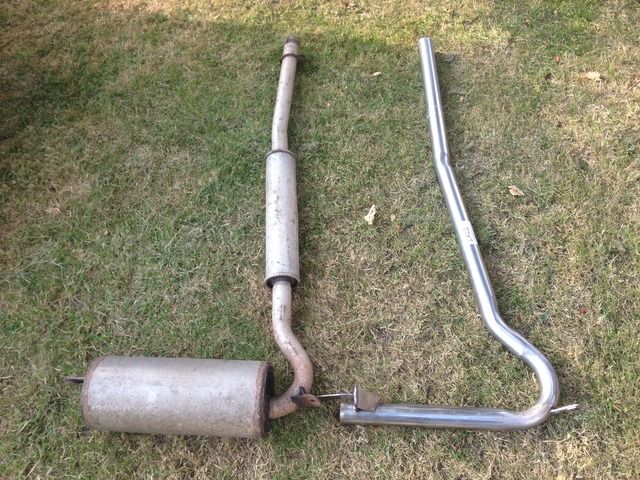 Took some persuading but now fitted, ansa 4-2-1 manifold straight through to the standard rear silencer... 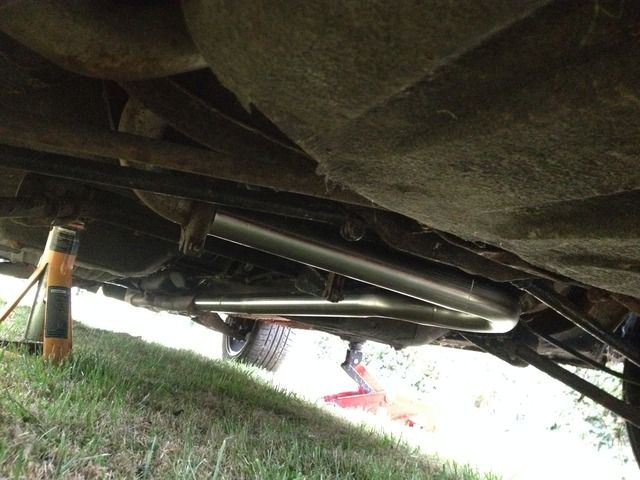 A couple of video's of it running at idle and fast idle, still a lot of learning and mapping needed before it hits the road but doesn't sound too overly loud and sounds quite raspy, I still think the throttle bodies will be making the most noise when at full chat... https://www.youtube.com/watch?v=Qv_ZjyxGbZQ https://www.youtube.com/watch?v=GAvnDwJvhQI https://www.youtube.com/watch?v=UClJajyQRSMHoping to have more to update on over the next few weeks rather than months. Next step, plan a revised list of jobs that need to be done, it could be quite a list  |
|
|
|
|
 Logged
|
|
|
|
|
WestonE
|
 |
« Reply #188 on: July 28, 2015, 08:34:45 AM » |
|
Marcus
Great progress but I think you will fail Goodwood noise testing and probably Castle Combe so start planning a straight through silencer where the 2nd box went and a clamp on tail silencer (Merlin do them). I am looking forward to seeing this car back to the track.
Cheers
Eric
|
|
|
|
|
 Logged
|
|
|
|
|
HFStuart
|
 |
« Reply #189 on: July 28, 2015, 09:16:05 PM » |
|
That's an ingenious solution on the crank pickup but won't the movement of the engine relative to the subframe cause problems? Or is your engine solidly mounted?
|
|
|
|
|
 Logged
|
|
|
|
lanciamad
http://www.flickr.com/photos/lanciamad
Hero Member
    
 Offline Offline
 England
Posts: 699
Marcus Robinson
|
 |
« Reply #190 on: September 03, 2015, 09:35:27 PM » |
|
Eric, i'd imagine your quite right, if decibel apps are anything to go by it's around 90db at idle!   I however don't plan to track the car for at least a year, so no need to worry about noise levels until then. I think a full year will be needed for niggles, future upgrades and changes that I can iron out by having it back on the road. Stuart, it's very much going to be trial and error, I have thought the same. So far so good, but the engine hasn't been put under great load yet, so i'm unsure of the maximum potential for movement. It's been a right pain, as from what I can see it's the only place that the sensor will fit and not effect the belts as originally intended. There doesn't appear to be anywhere other than where i've mounted it to fix the bracketry, so if the movement does become an issue, I don't know whether to upgrade the mountings to the PU items to minimize the movement or think about welding the bracket to the side of the sump pan possibly. Been doing a few odd jobs recently, lots of wiring needed soldering, routing and fitted out of the way... 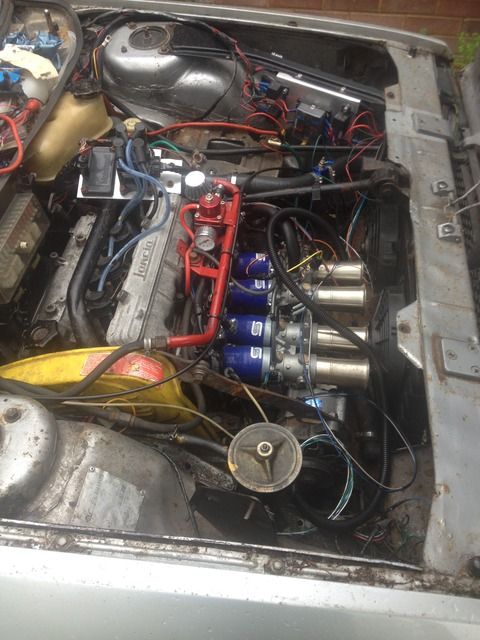 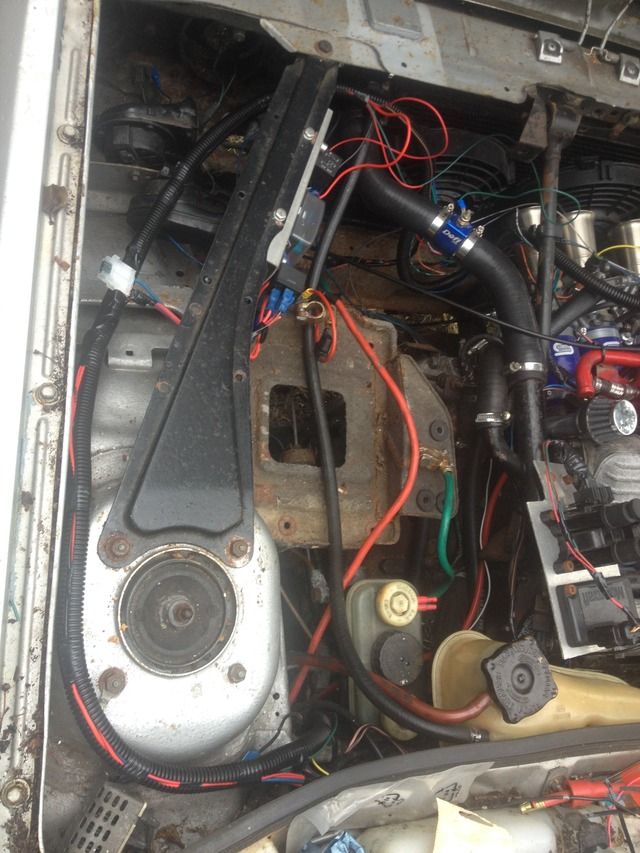 The original lights were starting to show there age and the chrome retaining rings had seen better days, so some new replacements fitted... 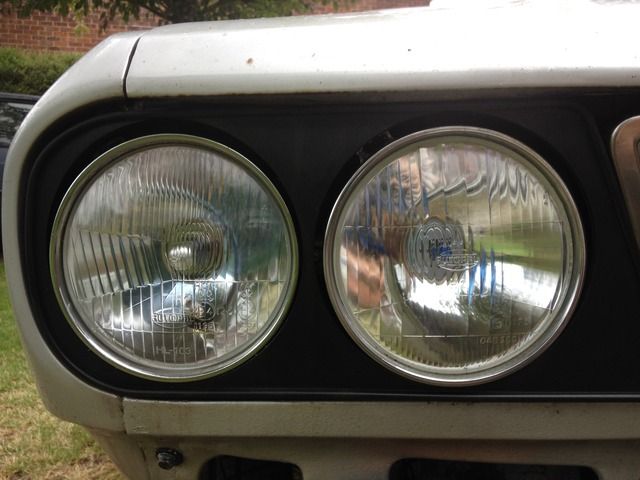 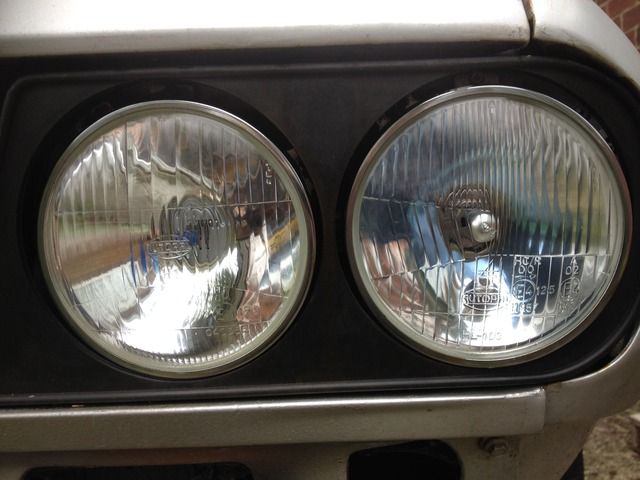 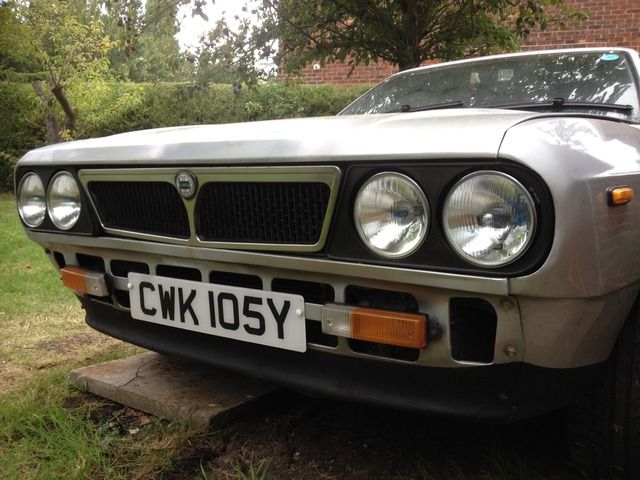 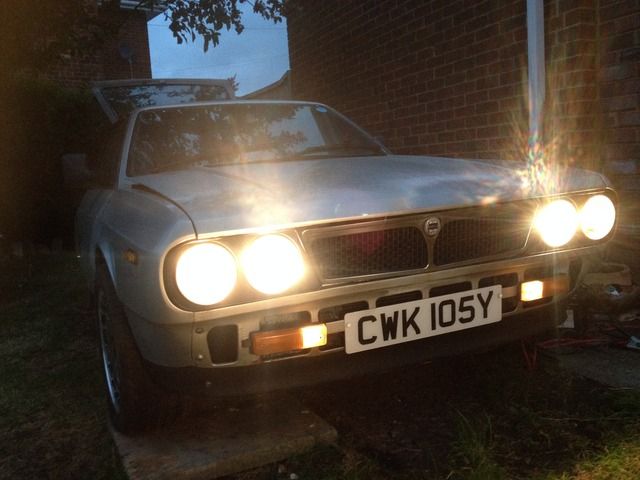 Using some sock type filters for the time being, but will be soon ditching these for an air box with cold air feeds to either side if possible, being fed from the valance... 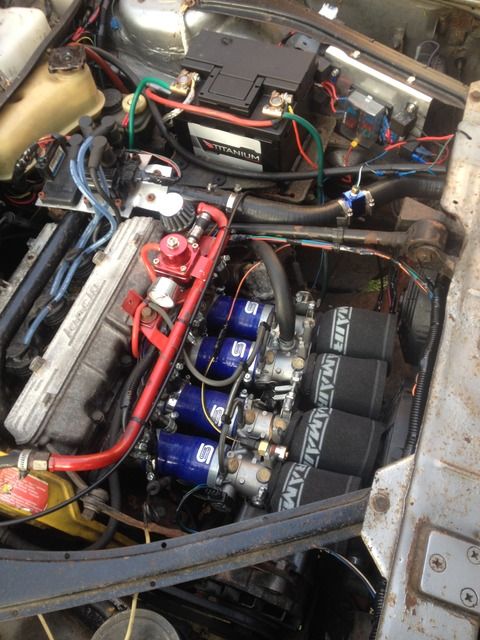 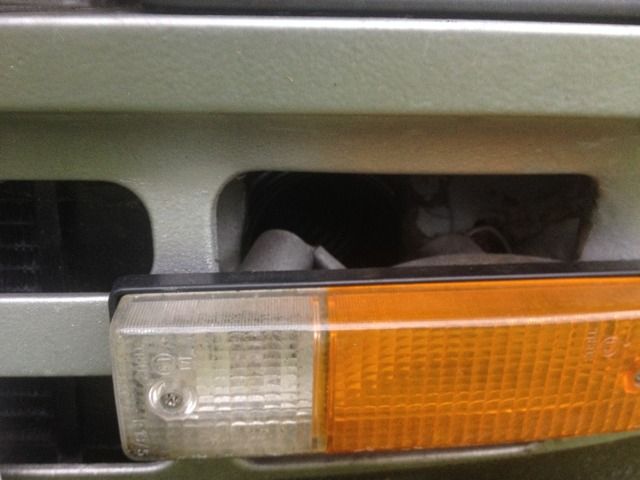 Not sure what it was orignally designed for, but I bought a strut brace a while back on the cheap which I intended to adapt to fit to the front; hour or so with the grinder, a drill and a spray can didn't turn out too badly... 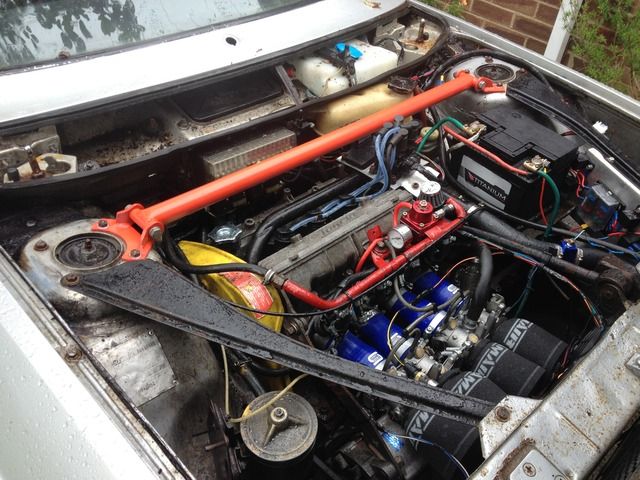 Treated myself to some new caps and a general degrease of the engine bay... 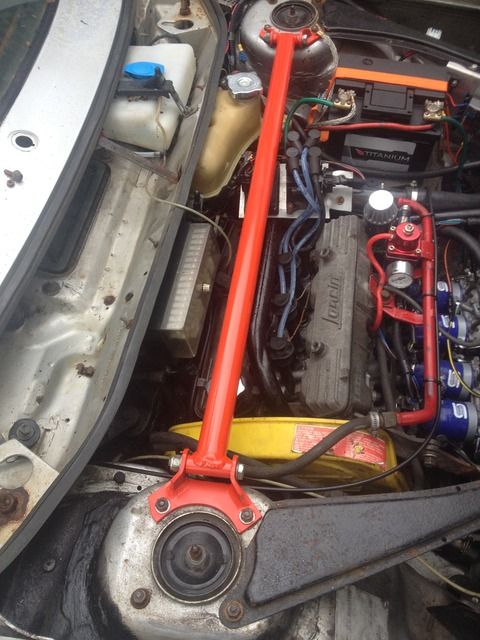 Couple of other little jobs, replaced the wiper motor, fitted aero style wipers, got the horn to work with the dished OMP steering wheel, tidied the wiring inside and gave the inside a good wipe over... 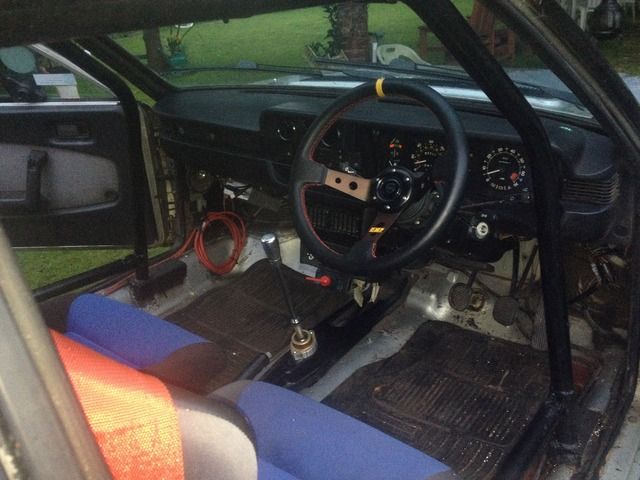 Got a few things to check over and tidy up, but apart from that hope to have some guys give it the once over and look at getting it mapped to somewhere sensible in the next week or so. Once that hurdles cleared, a big hurdle. I can look at getting it through an MOT; it's going to need a bit of attention to the nearside rear sill and the front cross member, but hopeful for not too long a list after that. When I get there........  |
|
|
|
|
 Logged
|
|
|
|
|
peteracs
|
 |
« Reply #191 on: September 03, 2015, 10:14:20 PM » |
|
Like the strut brace design, only issue is I cannot see how you adjust it, so cannot tension it. Was it the correct size as bought or was there some cutting and shutting required?
Peter
|
|
|
|
|
 Logged
|
Beta Spyder S2 pre F/L 1600
Beta HPE S2 pre F/L 1600
|
|
|
|
Neil-yaj396
|
 |
« Reply #192 on: September 03, 2015, 11:15:29 PM » |
|
Don't some tracks have DB limits? Or is that just Goodwood?
|
|
|
|
|
 Logged
|
|
|
|
lanciamad
http://www.flickr.com/photos/lanciamad
Hero Member
    
 Offline Offline
 England
Posts: 699
Marcus Robinson
|
 |
« Reply #193 on: November 09, 2015, 09:04:49 PM » |
|
Don't some tracks have DB limits? Or is that just Goodwood?
All tracks normally have a limit of around 98-102db at 3/4 max revs around a metre from the tailpipe, i'm yet to measure what it currently is with the single box system, but as i'm going to only use it on the road this coming year, it's not something I need to consider and I can always refit the original middle section or adapt the straight through pipe as Eric's mentioned. I'm quite surprised at how quiet it is considering, it's only above 3000rpm where it gets quite raspy. Like the strut brace design, only issue is I cannot see how you adjust it, so cannot tension it. Was it the correct size as bought or was there some cutting and shutting required?
Peter
It was a cheap punt from ebay really, it just happened that the main tube was of the correct length that I just needed to cut and re-drill the mounting plates to fit the strut tops; I purposely made it so it was only just possible to fit the two bolts, once tightened everything becomes under tension, it was a nightmare to get off again! Amazing how the time goes, over two months later but I have been busy behind the lack of updates, so be prepared for a photo overload coming up  . Since the last update, I finished off sorting out the wiring loom, routed various wiring and pipework and got it to a stage of being able to drive itself. Next step the rolling road; booked in as a rolling road session plus modifications required as problems were found, it was off to the tuners with the help of a trailer. Before they started any mapping, they found that the relatively poor running was due to a failing injector and with the plugs now 3 years old with little mileage, a precautionary change would be a good idea before torturing the engine. Luckily I had a spare fuel rail in the shed so the next day further investigations could be made after the injector was replaced and the plugs changed. The good thing was the guys were relatively impressed everything was in place for such a custom build, but anyone will say that when your paying them money  , the few modifications they made were as follows... The inlet manifold originally was letting air in as the hoses didn't have much material to be clamped to, so some extentions were welded on... 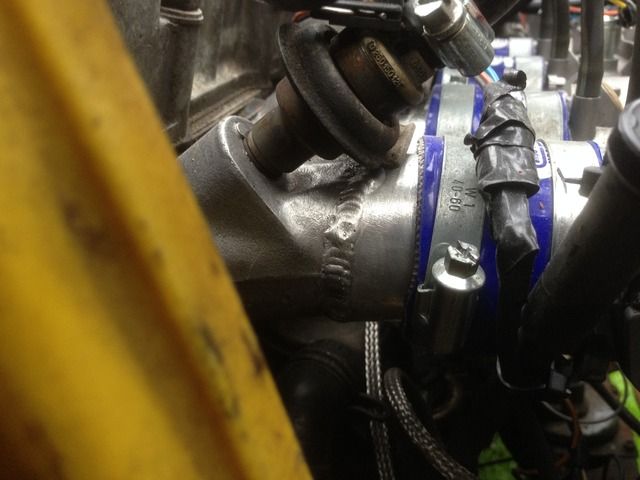 The linkage was adapted so the bodies could be adjusted independently of each other... 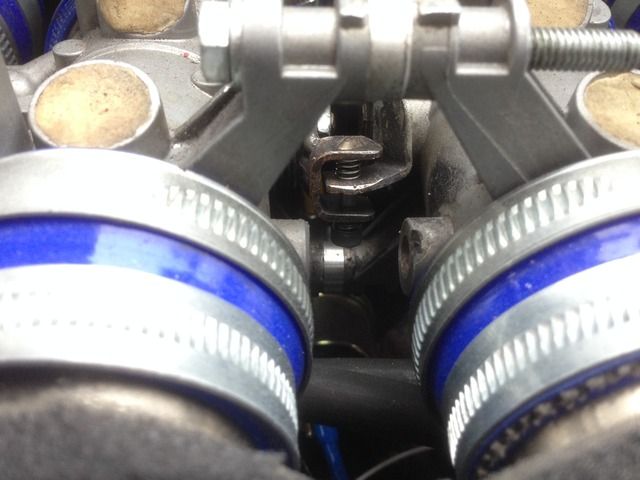 Trumpets held in place by reducer hose and clips... 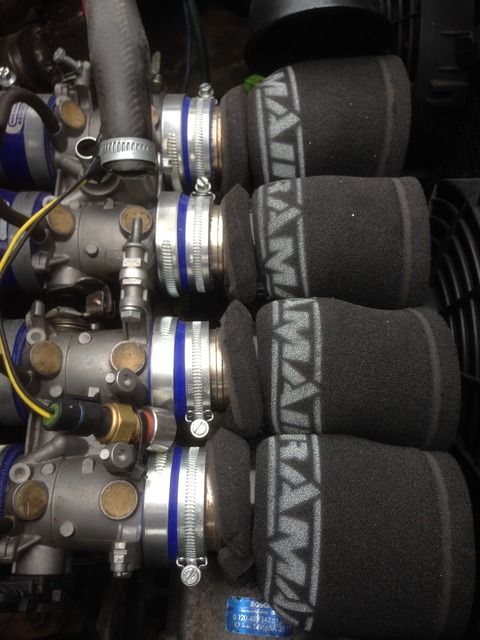 And the big one, that crank position sensor! On first investigation it appeared that the original sensor placement was doing the job but with further runs and checks it was pulling away from the sensor when under load. So with a rethink, a bracket was made that meant the sensor was in basically the same place but utilized two bolts that hold the sump on, in which the sensor and trigger wheel will always keep the same gap... 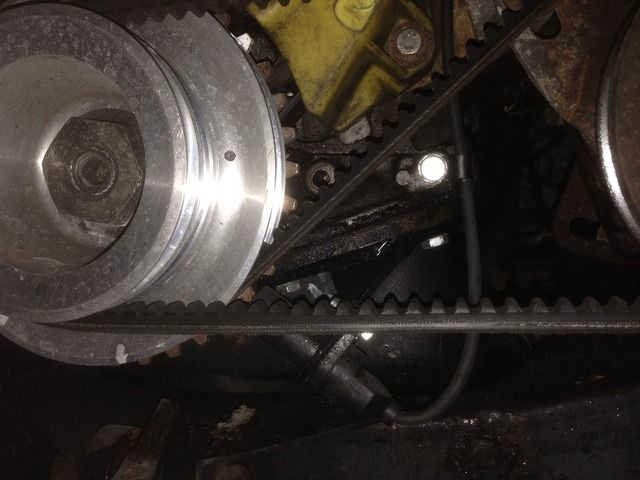 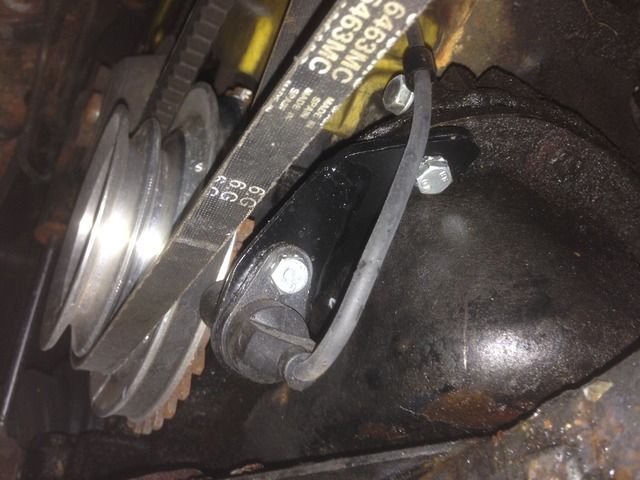 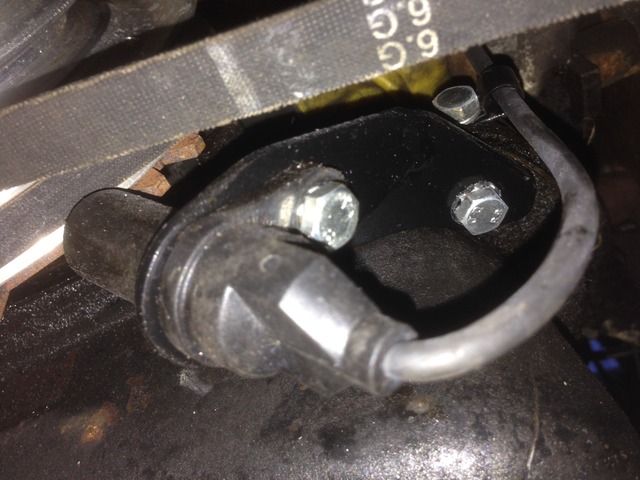 Final result, mixed emotions really, it would have been nice to think a gain of 20+ bhp was on the cards, but as I got to the latter stages of the build it was more the relief that the project had actually worked and i'd got it working rather than what bhp it was going to produce. Here's the final run... 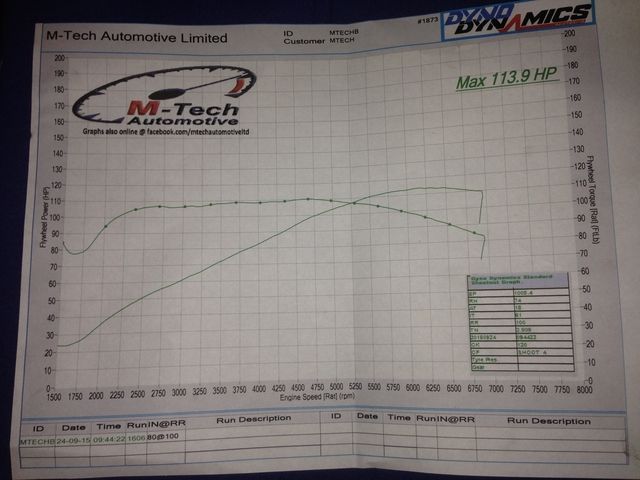 For comparison, the same place rolling road it in 2010 running the standard equipment producing 108bhp @ 5400rpm and 127ftlb @ 2500rpm, it's currently running at 114bhp @ 6100rpm and 110ftlb @ 4600rpm. The drop in torque i'm not quite sure about, they suggested that the engine timing maybe slightly out and it didn't seem as though it was flowing quite as well as they'd expect. The potential for bhp will only hopefully double with any future engine modifications, and think the setup is begging to be on a big valve high compression engine really. Although i'm not sure of why the drop in torque yet, it's still a 6bhp gain on the standard engine and the map shows that where previously the max torque was at 2500rpm and dropped off slowly it now actually starts from 2500rpm and actually gains all the way to 4600rpm where it slowly drops off; i've only driven it a few miles but it's noticeable and it really does seem to pull like a train. |
|
|
|
|
 Logged
|
|
|
|
lanciamad
http://www.flickr.com/photos/lanciamad
Hero Member
    
 Offline Offline
 England
Posts: 699
Marcus Robinson
|
 |
« Reply #194 on: November 09, 2015, 09:05:49 PM » |
|
Having got it up and running, and now mapped running the bike throttle bodies, my attention turned to jobs that would have to be done for the MOT. Without looking too hard, the nearside sill had deteriorated quite badly in the 3 years since I last had to have a look at it, and I decided to give it ago at repairing myself. I don't claim to be a professional welder nor bodywork expert, but considering i'd done very little of both and can't afford to spend mega money on the car after the latest project i'm reasonably pleased with how the repairs went, even if I have to revisit somethings in the future, like replacing the whole sill, sections or panels that Mark is now making available in the future. Something I do plan to do once i've got bored of bolting things on and run out of modifications I can afford  That scary moment when grinder hits the paint... 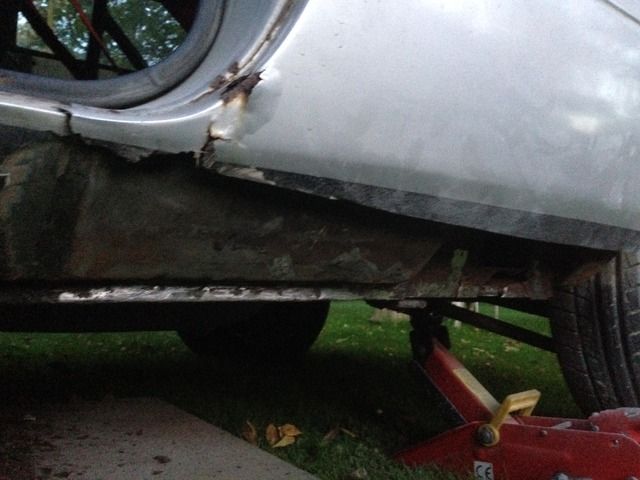 Found that the usual area for rusting at the top of the outer sill by the door shut was covered up with fibreglass and filler last time around... 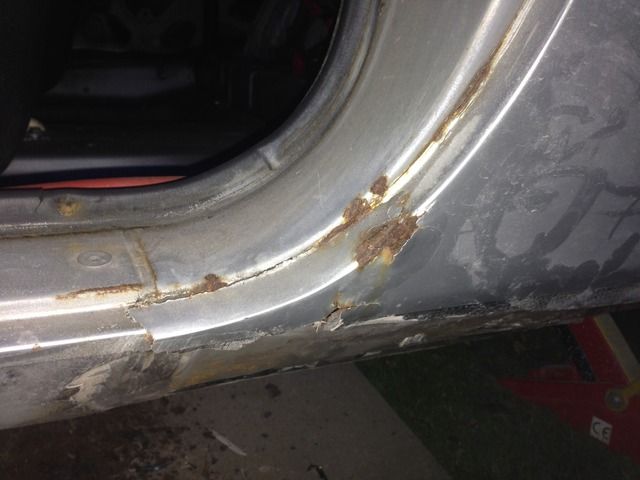 Inner sill, thankfully caught in time, before and after... 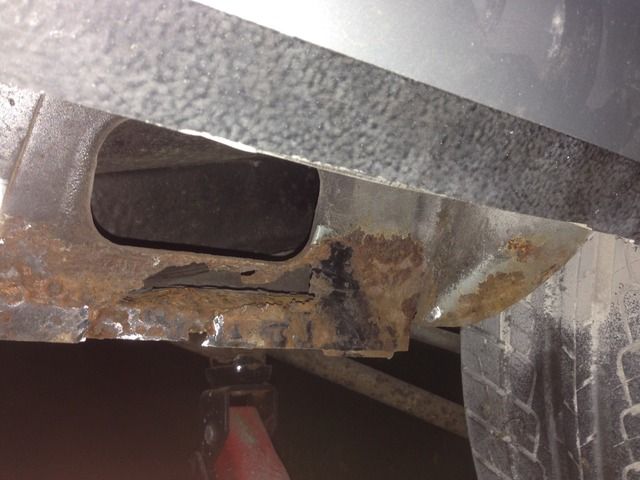 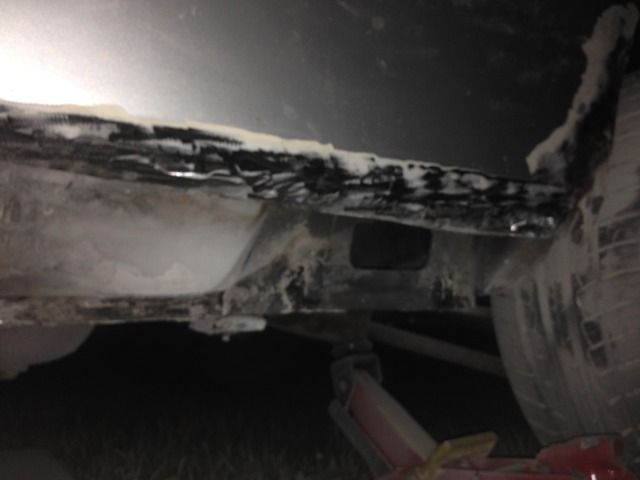 Outer sill bent to shape as close as I could make it... 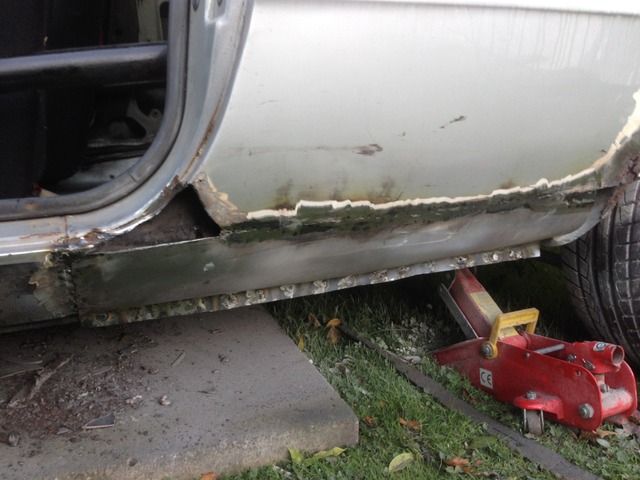 Finding some metal... 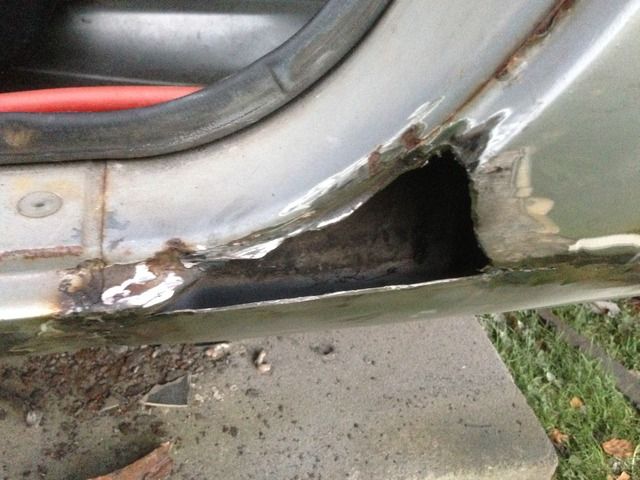 and filled in with metal this time... 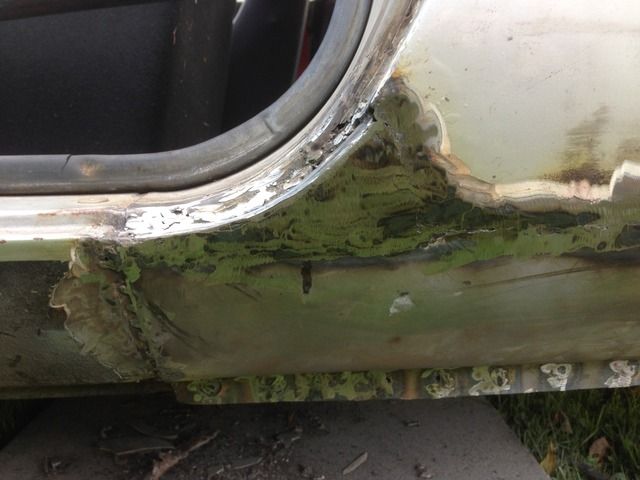 Chasing the rust going up the rear arch, it took nearly 1cm thick of filler to discover metal which in the end was mostly rust anyway... 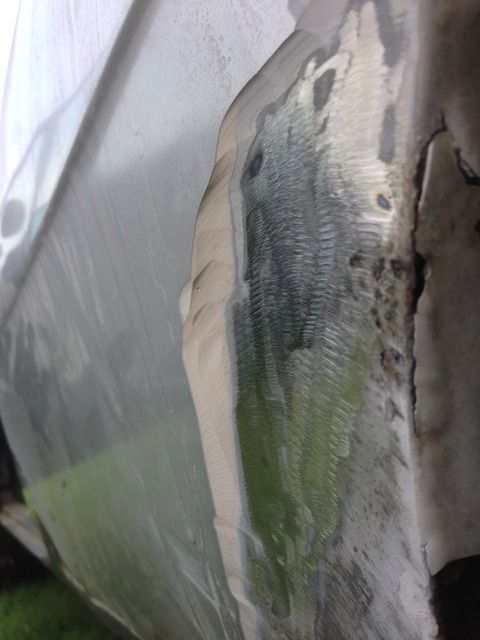 More grinding... 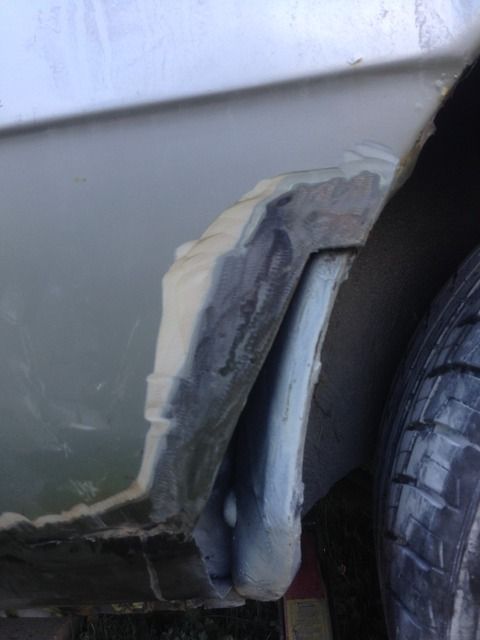 This has so far been the best example on my car of the famous rusting from the inside out... 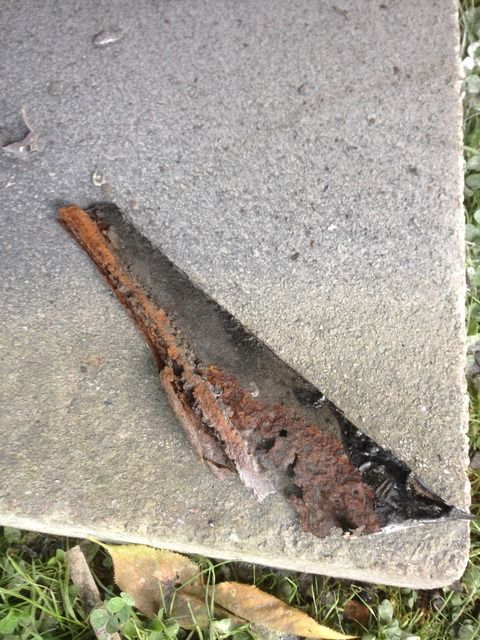 Yet another repair section... 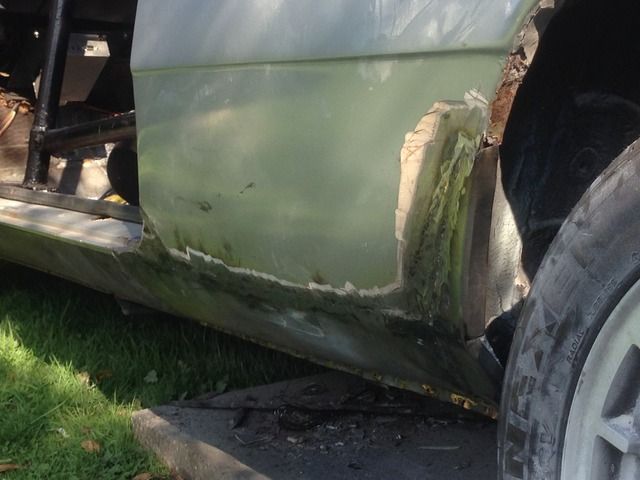 Filling in the imperfections... 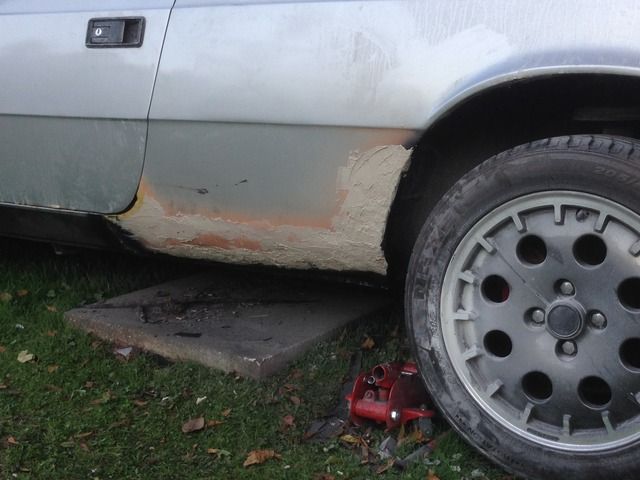 and nearly there... 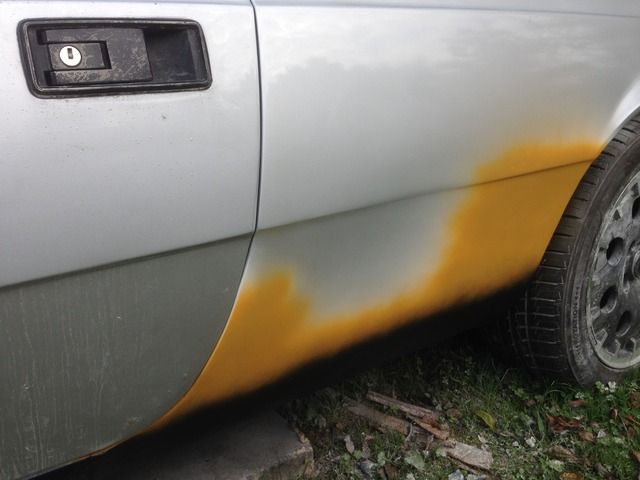 Due to accident damage a massive amount of filler was used on the offside rear panel which eventually cracked and then came off as one, i've tried filling it mostly with fibreglass this time to see if it will bond more successfully... 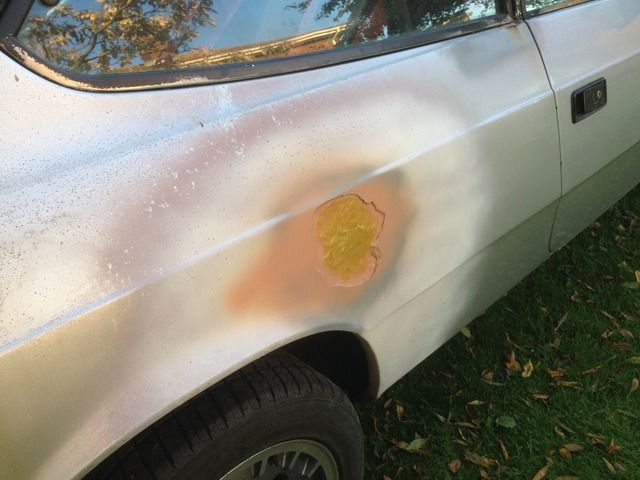 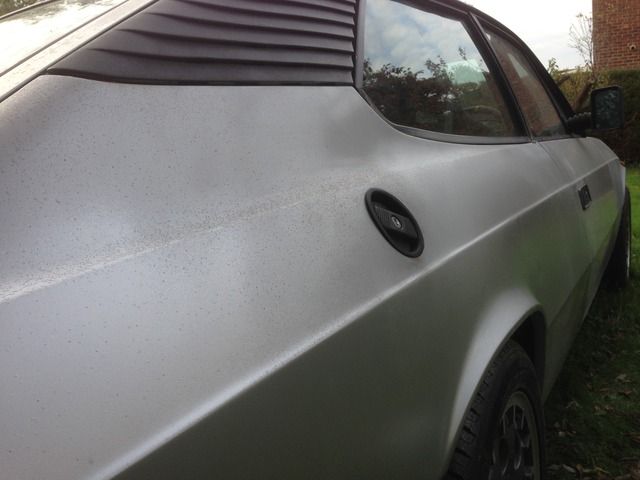 Having a break from the bodywork, i've fitted an oil catch tank with site glass to replace the previous setup of having the original pipe venting via a filter over the engine, covering everything in a very fine mist of oil vapor, with it now going to the catch tank near the rad, so far so good... 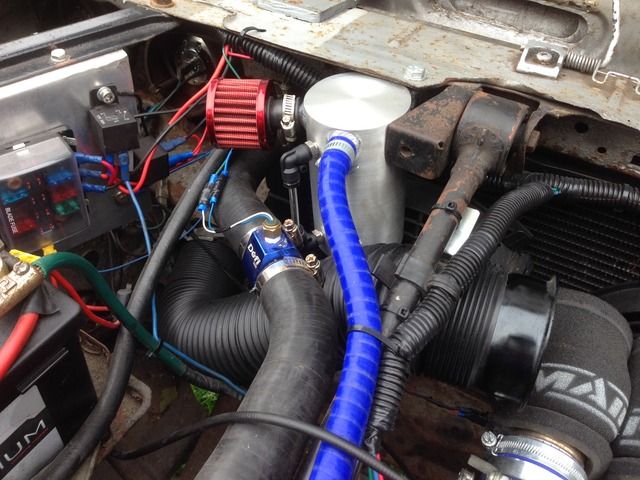 |
|
|
|
|
 Logged
|
|
|
|
lanciamad
http://www.flickr.com/photos/lanciamad
Hero Member
    
 Offline Offline
 England
Posts: 699
Marcus Robinson
|
 |
« Reply #195 on: November 09, 2015, 09:06:56 PM » |
|
With the sill now complete and the only thing I knew needing attention being the front cross member, I took the car for it's MOT. Luckily I get on with him well and he said he'd give it a once over before putting it through the system and let me know of anything major before he went through it thoroughly. It had previously had to have a plate welded on the cross member before and without the use of a ramp wasn't something I fancied doing myself. Having paid little attention to it as I knew I wouldn't being doing the work, I turned up at the garage hopeful there's not much needed, to be told it's worse than first thought, he'd seen a crack in it and the state of it, wasn't worth attempting patching. With them not being able to fit it in for weeks and it would need pretty much everything removing including subframe, engine etc I brought it home and decided to start stripping the car and see how far I'd go with it. This is the crack that he claimed, but to be honest the way it seems to be connected, by about 6 spot welds on three tabs as I found out, suggests that this is how it is and the sealant gives the impression it's seem welded... 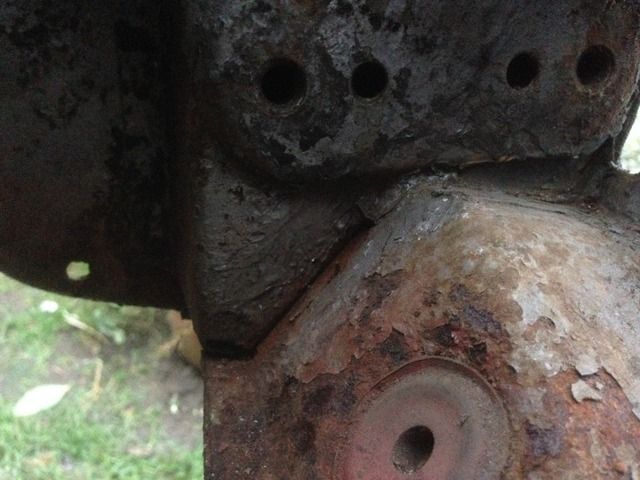 Front of the car taken off... 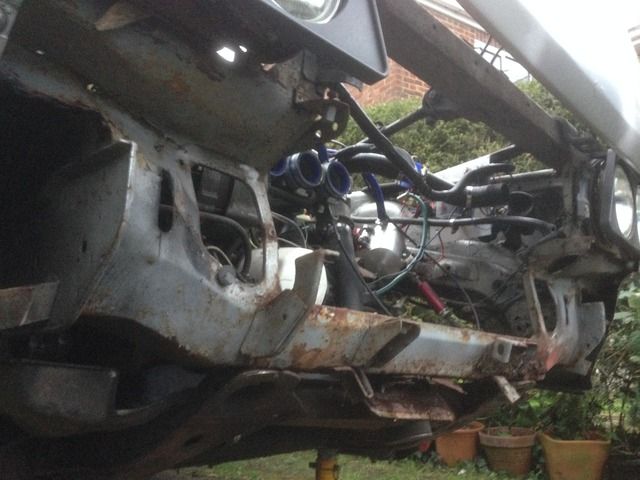 That messy patching repair previously done for an mot a while back... 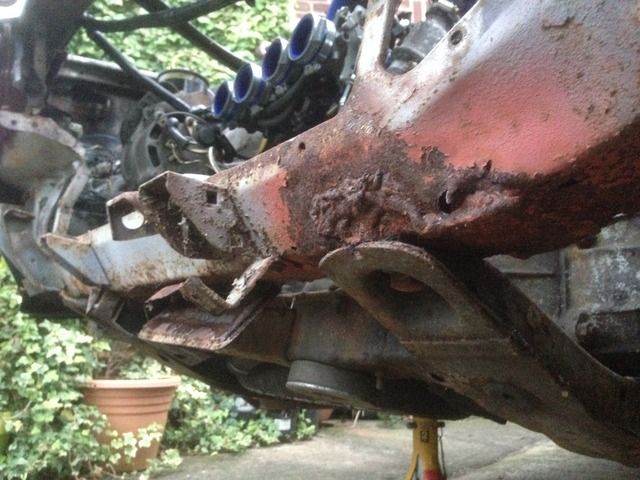 I worked out that what was once feared that I would have to drop everything out and strip the engine bay completely, i'd be able to get away with supporting the car, subframe, and engine independently and be able to cut out the offending section, which I did... 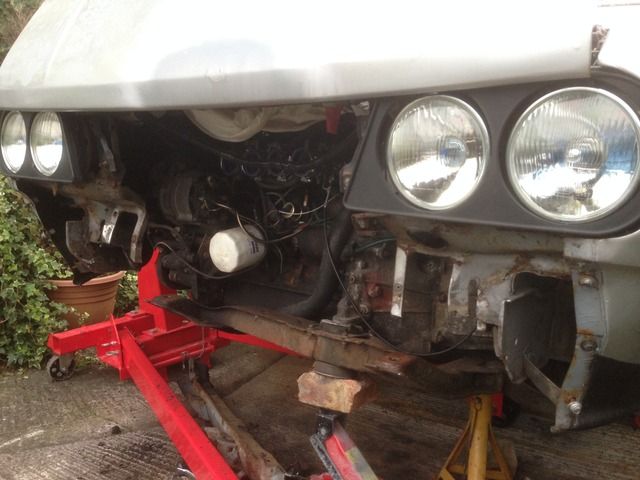 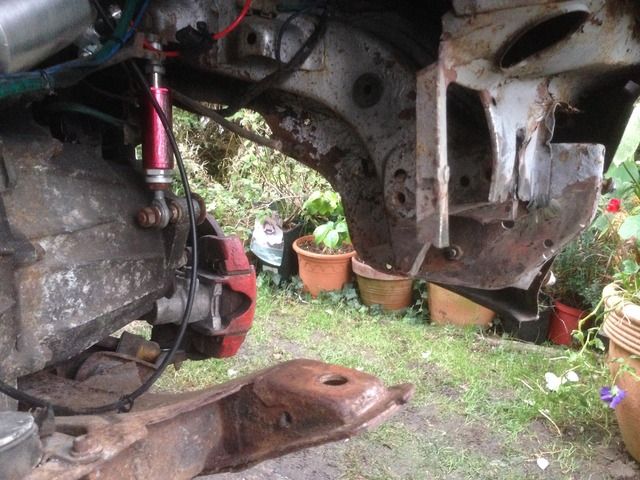 Once off it was clear that it was on it's last legs... 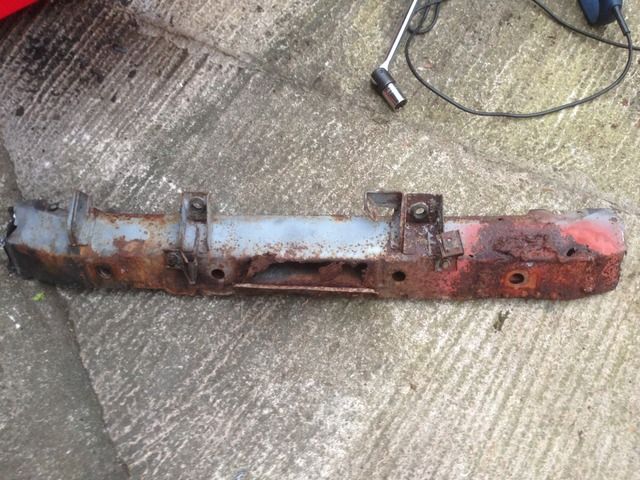 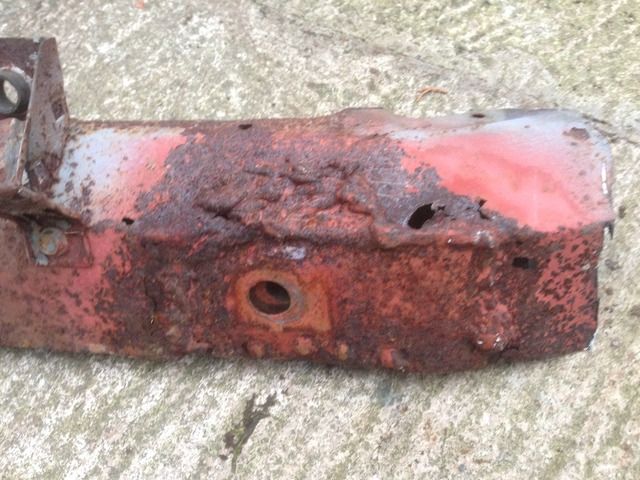 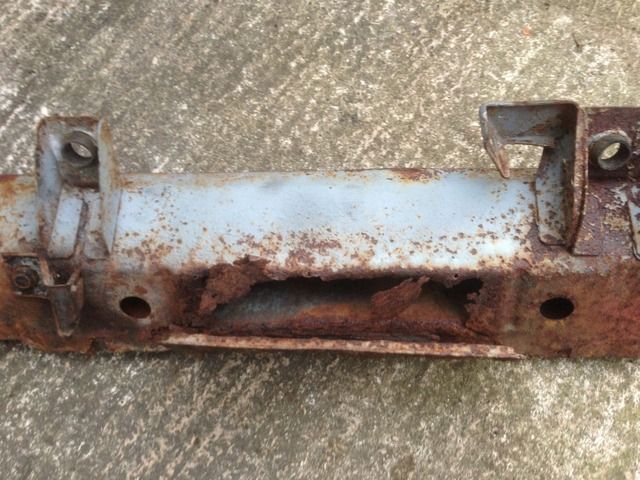 The only good news if there was any, was that i'd purchased almost by mistake getting on for nearly 10 years ago, a front cross member in decent condition and more amazingly managed to find it! Thankfully still in good condition, I got to work on removing any surface rust... 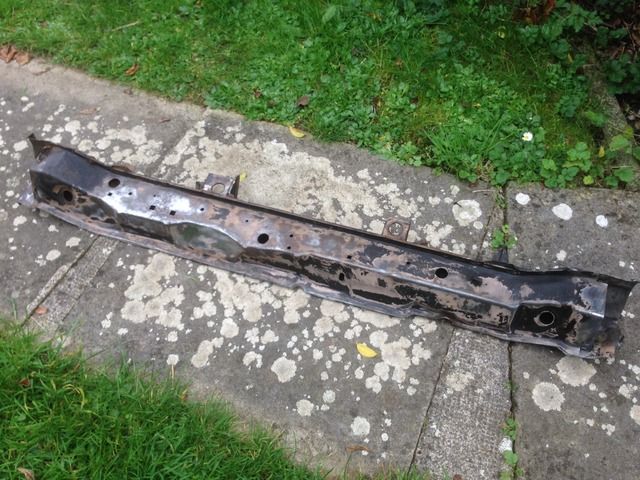 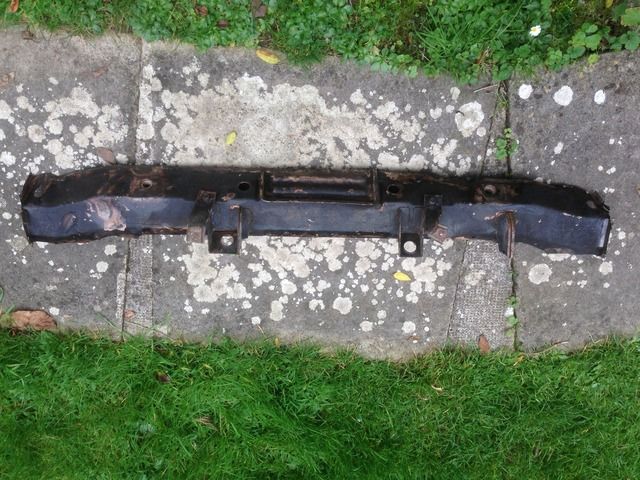 and then painting and preserving the replacement... 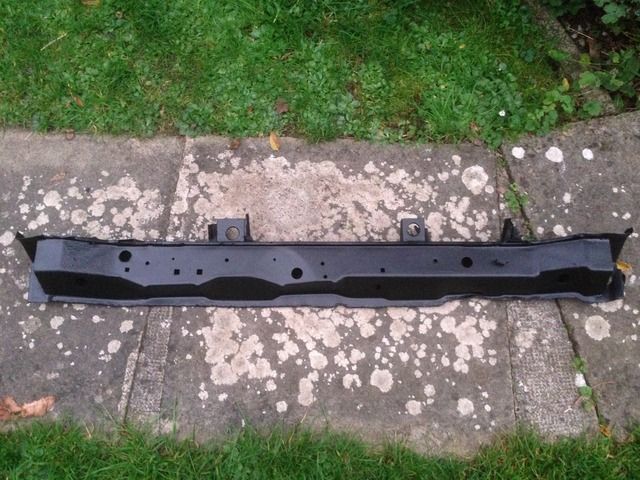 It appeared to me that the original seemed to be welded in 6 places via the three tabs, but with this replacement I hope it's on there for life now, seam welded all tabs and wherever possible, I also welded an additional plate either end for added strength... 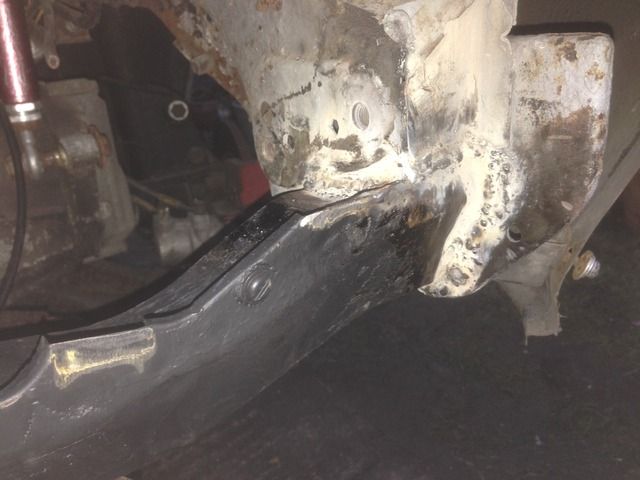 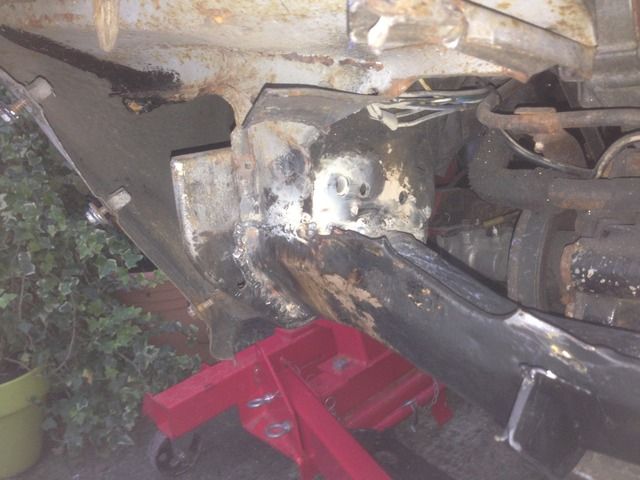 Replacement fitted, it was a relief that everything went to plan and everything fitted perfectly... 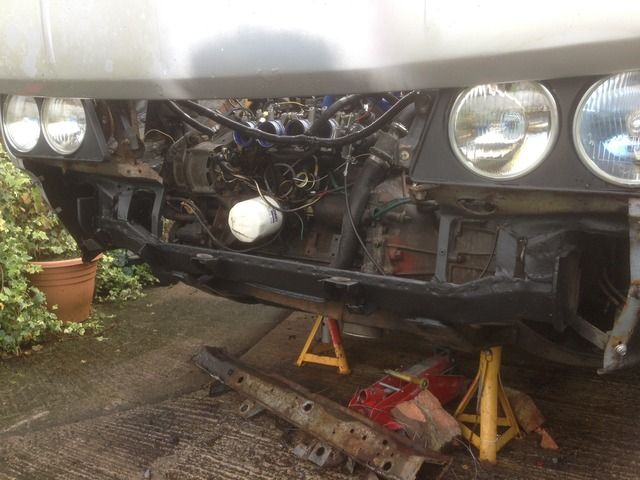 Having thought I could put the welder away, the hole in the floor where the rubber bung fits gave way, so thought I better do something about it... 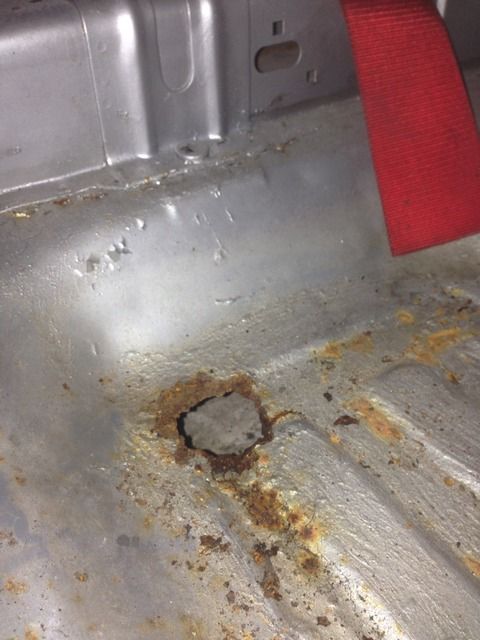 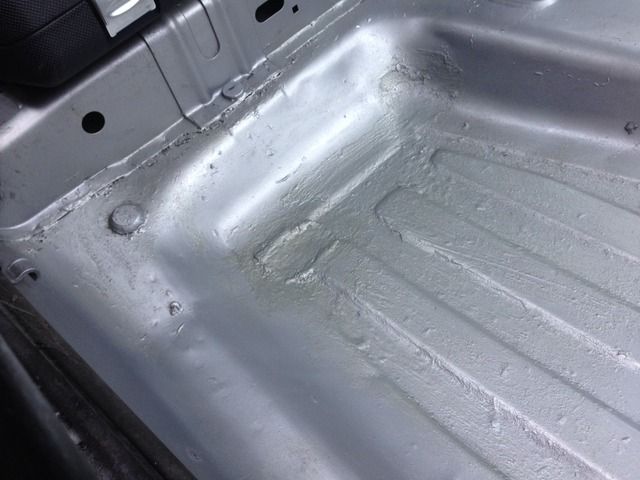 and then thinking that was that, a check over the suspension, I came across corrosion setting in on the rear strut... 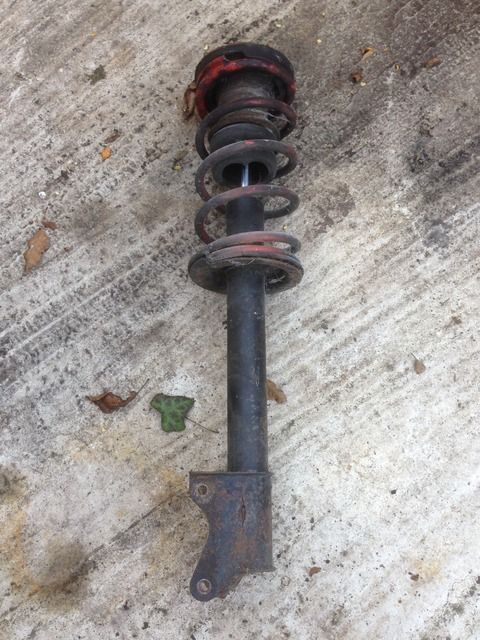 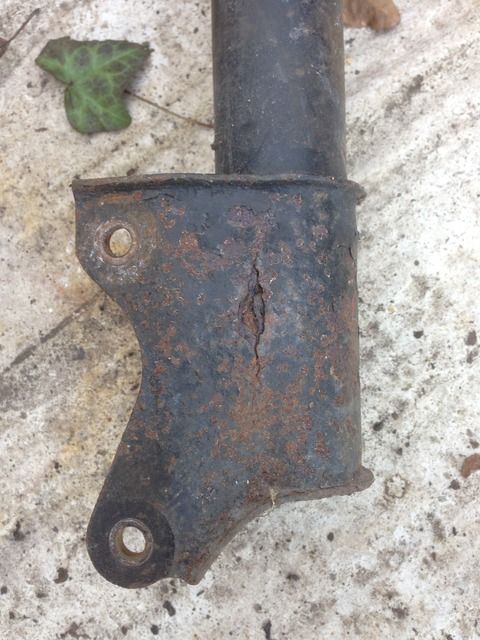 Some grinding and repair work later, I could finally put the welder away... 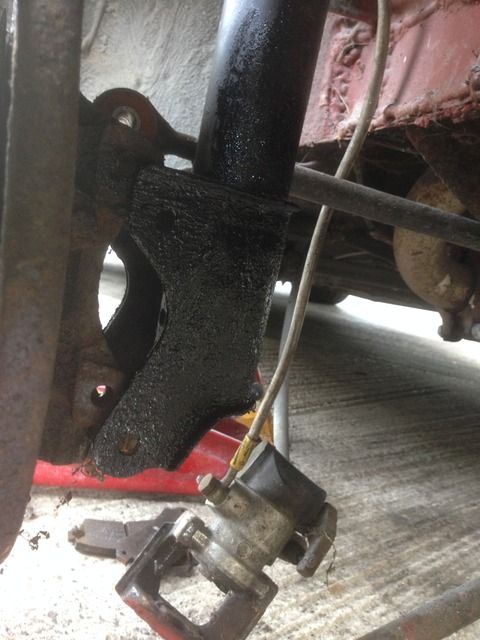 Back to the MOT, everything got the thumbs up but for a rear wheel bearing needing replacing and yet another little patch under the jacking points each side, last friday comes along and 12 months on the road are mine  I won't be taxing it until the beginning of December or possibly January, but it's nice to have got it through the MOT now lights limited and I can't wait to get behind the wheel again... 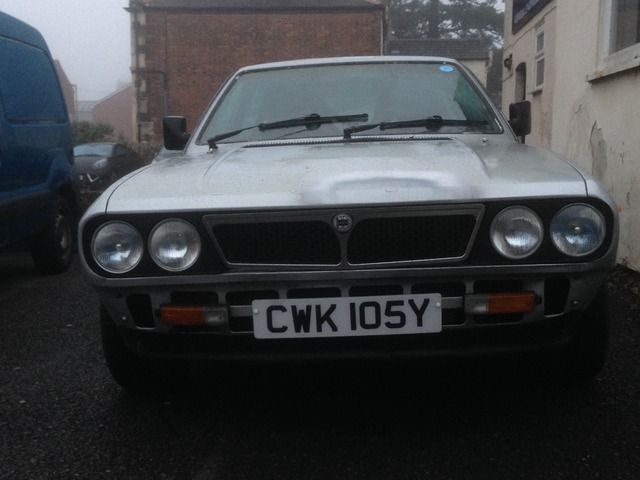 Things for the future, although the fibreglass wings are very good there's some slight imperfections to deal with so i'm slowly working through getting them ready... 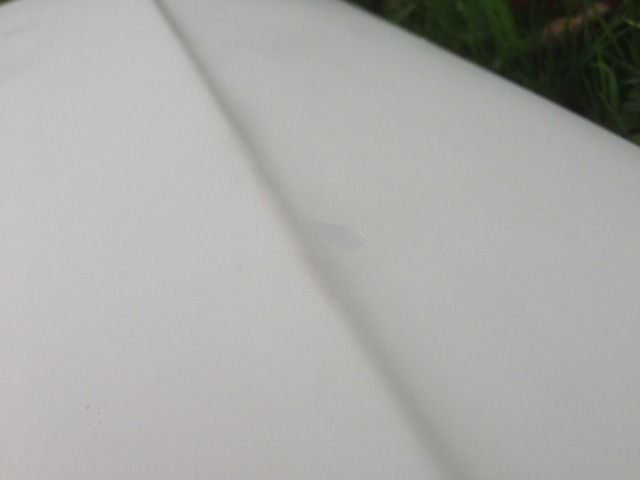 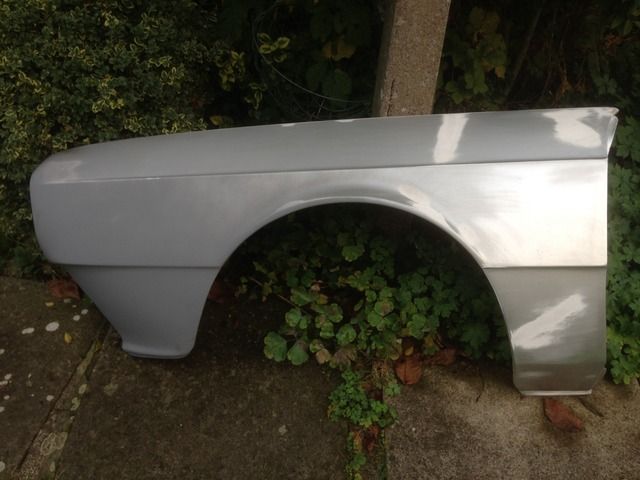 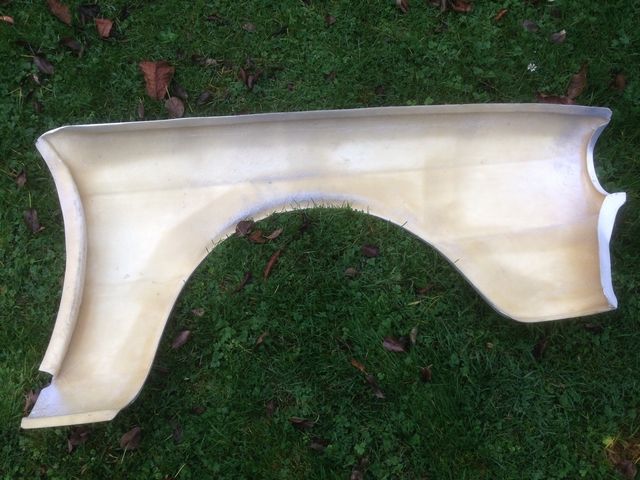 Another reason for being broke, with the future in mind and bodywork to sort, all rust issues are resolved and a lot of weigh loss will be achieved by fitting fibreglass doors, these are for the coupe so I will have to modify the window frame to fit the HPE but really pleased with them, fitting all the door locks and hinges will be a challenge in itself i'm sure, but no plans immediately for them to go on... 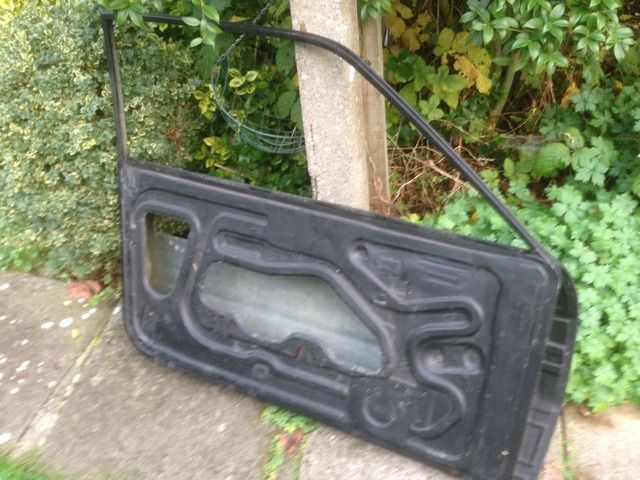 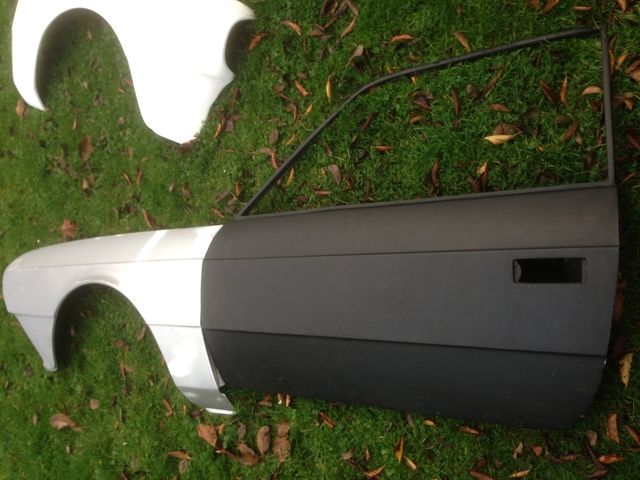 and finally for now, with various welding repairs and general wear and tear over the years, a good clean out and repaint of the floor awaiting the arrival of some hopefully more comfortable bucket seats for those longer journeys and road driving I will hopefully experience in the coming year, I don't even think my back could take the potholes juddering through a seat with literally a piece of material separating your spine from springs... 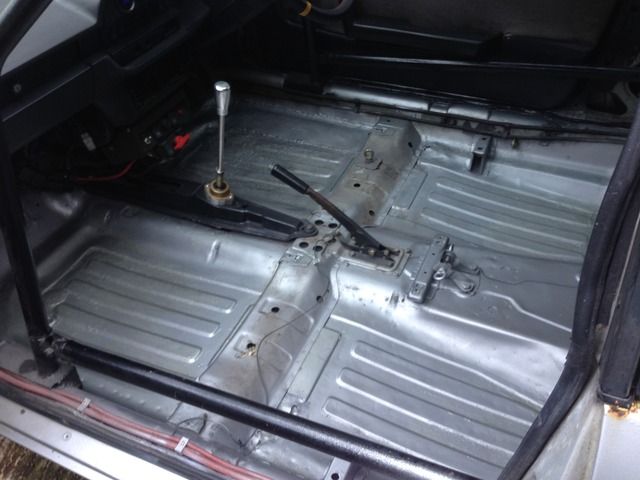 |
|
|
|
|
 Logged
|
|
|
|
|
smithymc
|
 |
« Reply #196 on: November 10, 2015, 08:12:27 AM » |
|
More inspiring work- keep it going!
Makes my winter plans seem pretty minor!
Good luck.
Mark
|
|
|
|
|
 Logged
|
|
|
|
|
WestonE
|
 |
« Reply #197 on: November 10, 2015, 09:44:52 AM » |
|
Marcus
Well done.!!
Eric
|
|
|
|
|
 Logged
|
|
|
|
|
HFStuart
|
 |
« Reply #198 on: November 10, 2015, 08:14:20 PM » |
|
Good effort Marcus!
|
|
|
|
|
 Logged
|
|
|
|
HF Stinger
Jr. Member
 
 Offline Offline
Posts: 12
|
 |
« Reply #199 on: July 08, 2016, 01:35:24 AM » |
|
Have followed this for a couple years now, but now Im must ask about your lower pulley with the timing wheel...
I think you mentioned that you purchased it from BetaBoyz? I haven't seen it on the website, was it a special order item? I need 2-3 of them myself for EFI projects that I have building up in my garage.
Does anyone else know a source for these?
thanks in advance
|
|
|
|
|
 Logged
|
|
|
|
|


